Frequently Asked Questions

Do I need to use a vacuum sealer?

Only if you already have one, or you plan to store food without refrigeration for a long time. It's not something we think is absolutely necessary, and we don't use a vacuum sealer terribly often since it's easier to just use zip top sandwich bags and freezer bags. Vacuum packed food becomes a rigid unmaleable shape that does not conform well to your bag, bear bin, or any other container. While it compresses the food inside the bag, once you stack them together it creates a lot of wasted space between each bag since they don't seat well with each other.

However, if you do choose to get a vacuum sealer, don't make the same mistake we did. Get one with a built in holder and cutter for the roll of bags. It's a total PITA to cut those bags straight and even with scissors.

Should I buy an Excalibur dehydrator?

In a word, YES.

One of the goals of making your own backpacking food is cost. It's significantly cheaper to make your own food than it is to buy something already prepared. While we don't recommend going broke or into debt for a dehydrator, in a sense, it's an investment. An investment in your health and your taste buds.

Excalibur dehydrators are as their name suggests, legendary. You can get a cheap Nesco, Presto, etc, etc, at a fraction of the price but none of them will dry as fast or handle as much volume. There's just no beating the back-to-front airflow design of the Excalibur, and the 15"x15" square trays don't have a hole in the center which equates to a substantial incrase in surface area. It's very popular amongst homesteaders and gardeners who rely on it to preserve their harvest and stock up for the season to see them through tough times—it's a beastly work horse, plain and simple.

If you're not planning to make a tremendous amount of food all at once, I'd recommend the 5 tray Excalibur #3500B (without a timer). It's one of the most affordable models and just the right size for dehydrating 6-7 servings of food. I have the same model but with the timer and I never ever use it; things can't get over dried so it's a non issue with leaving it on. If you've got room to spare, and a permanent place to keep it (because they're pretty heavy and you probably don't want to move it often) then the 9 tray Excalibur #3926TB (with timer) is a no brainer. This is good if you have a garden or purchase lots of seasonal items and need to bulk dehydrate food, but be aware that it's going to take up quite a bit of space.

If you absolutely can't justify the cost of an Excalibur, get the next best thing (and incidentally, the #1 selling), the Nesco Snackmaster Pro FD-75A. Avoid cheaping out where it matters, especially the ones below $50. It'll save you a lot of time and frustration when you don't have to constantly rotate trays or reload multiple batches of food.
How should I store my meals?

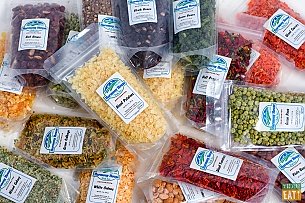
  • Long term storage - vacuum pack it and store in freezer. Do not open the container until the food is at room temperature, otherwise it will create condensation inside the bag and get moist.
  • Short upcoming trip - store in the smallest, lightest available zipper bags in the refrigerator until departure. Always let cold food get to room temperature before opening the bag.
  • For resupply cache or longer trips - vacuum pack with food-safe oxygen absorber and desiccant packet. Repack into smaller, lighter zipper bags upon resupply.

We take a paranoid precautionary level of prevention when it comes to storing meals. The preferred method is simply zip top sandwich or freezer bags; it allows the food to breath with the environment and exposed to oxygen giving it the opportunity to grow mold and spoil. This spoilage occurs first and is visible to the eyes and nose and will indicate that the food should not be consumed. Food stored in a vacuum bag will result in longer shelf life, but can also become a breeding ground for foodborne illnesses that thrive in moist oxygen-free environments, like botulism, which may not alter the taste or smell of the food. To be safe, we store foods in vacuum bags with oxygen absorbers and desiccant packets to remove every last bit of oxygen and moisture.

Is this safe?

Safety is not guaranteed, but nothing worthwhile in life is. While we’re at it, let’s get this out of the way. All information presented on this site is for entertainment purposes only. Nothing is based on factual food science and all ideas, concepts, suggestions, recommendations are anecdotal at best. Foodborne illnesses are very serious and may result in severe detrimental lifelong impacts and even death. Always properly handle, sanitize, cook, and store your food at the recommended temperatures as suggested by the FDA. Proceed at your own perile.

That said, food dehydration has been around for a very long time, since at least 12,000 B.C. (http://nchfp.uga.edu/publications/nchfp/factsheets/food_pres_hist.html) and is still regularly performed and consumed by people all over the world. It’s a time tested food preservation technique that if performed correctly can result in safe, tasty, nutritional, and light weight meals. 

How long will my dehydrated meals last?

For safety/health/legal reasons, let’s just say 1-2 weeks in a sealed non refrigerated container, 2 months in the fridge, and 6 months to a year in the freezer. In reality, dehydrated meals will last much longer than you’d think and depends on how and where it’s stored. Anecdotally, when we prepared for the John Muir Trail the majority of our meals were made weeks before we mailed our resupply, our resupply was sent out 5 weeks before we picked it up, and then we carried it up to 8 more days. No one got sick and everything tasted great. When in doubt, use your sense of smell and taste for anything that might seem off.

Are freeze dried ingredients better, and should I use them?

That depends on your definition of “better.” Freeze dried ingredients always win the texture and often the flavor department and are better in that regard. However, they take up significantly more volume since they retain their shape. This is an important point to consider if your trips require you to store food in a bear cannister or you have a small pack. You will be able to fit significantly more food and calories into the same space with dehydration instead of freeze dried.

It boils down to what is most important to you. If having great texture and flavor is your goal, freeze dried all the way. If cramming as many calories into as small a space as possible, dehydration is the name of the game.

For short trips that only last a couple of days or long thru hikes with frequent resupply caches, freeze dried can’t be beat. If you’re going on long or extended thru hikes with stretches of no support or resupply, and need to carry as much as possible, go with dehydrated.

Are there any meals or food that I can make without using a dehydrator?

Absolutely. Not every meal requires you to have a dehydrator, but having one significantly increases your options and variety. You can also substitute most dehydrated ingredient in our recipes for a freeze dried one. Alternatively, there are many options for bulk dehydrated food available online.

Why should I make my own backpacking meals?

There are numerous reasons to dehydrate your own food for backpacking, and they vary from person to person, but here are some common ones:

  • Cost. You’re able to purchase food that’s in season and on sale to make your meals. If you backpack and/or camp a lot, you quickly recoup the initial cost of the dehydrator and accessories from the number of cheap meals you can make going forward.
  • Variety. There are only so many options commercially available. When you dehydrate or make your own meals the options are pretty much unlimited.
  • Dietary restrictions and food allergies. Most commercially available food for backpacking do not take into consideration someone who might have special requirements like gluten free for celiac disease, or, peanut allergies. Most products are processed in a facility that also processes wheat or peanuts. Making it yourself ensures you have total control.
  • Taste. Very rarely do you have a pre-packaged meal so good that it makes you say, “I’d eat that at home.” They’re usually too salty or have a taste that’s just not that great. When you make your own meals, it suits your taste preferences and particularities.
  • Bulk, volume, and waste. You’re packing it in and packing it out, right? When you buy something prepackaged it’s typically in a container that’s significantly thicker and tougher than necessary for the trail because it needs to survive transport and sitting on a store shelf. In addition, it’s a portion size that someone else dictated so if you can’t finish it, you’re carrying it. A homemade meal can be stored in something as thin and light as a sandwich bag, and you’re able to control exactly how much food you want to bring so there’s minimal waste.
  • Preparedness. Dehydrated food can last quite a while, and even longer in the freezer. Having a stockpile of backpacking meals ready to take on your next adventure can come in very handy in the event of an emergency.

Why does my meal rehydrate so poorly?

Dehydrated proteins like chicken and beef will never completely rehydrate to their former pre-dried texture, but they should not be chewy or tough. Since we can only dehydrate things that are low in fat, it means the protein probably wasn’t very flavorful or texturally interesting to begin with, and removing all its water further changes the texture.

However, the more likely reason your food is rehydrating poorly is probably due to a lack of rehydration time. Temperature plays a small role in proper rehydration. The real key to success is time; the longer you let your food soak in water, the better rehydrated it will be.

Cranking up the heat will not speed things up and just waste fuel. The optimal procedure is:

  1. Upon arrival to camp, start the cooking process by soaking your dehydrated ingredients in the order as recommended by the recipe.
  2. Go set up your tent and get settled in.
  3. Turn on your stove and bring the pot of water to a simmer and follow the rest of the recipe instructions.
  4. Cover, turn off the stove and let it sit for 10 minutes. If it’s cold or windy, periodically turn the stove on or leave it on the lowest possible setting.
  5. Now wait. Get clean, gather wood, fetch water, look at tomorrow’s route, etc. Just wait.
  6. Stir and check a couple times to make sure everything is evenly rehydrating.

The whole cooking process from initial soaking to ready-to-eat is typically in the 20-40 minute range. However, your direct interaction in the process is less than 5 minutes since you’re doing other things as it sits. This is obviously not ideal if you’re starving and want to eat right away, but that’s the price you pay for having a home cooked meal on the trail. If you’re camping in bear territory, be sure to keep your food close-by within sight and stay vigilant.

Can I over dry my food?

Not really. The drier the food, the longer it will last before spoiling and the less it will weigh. Depending on your dehydration goals and taste preferences it may change the texture. For example, some people like crispy banana chips, while others prefer it slightly chewier.

Can I crank up the temperature to speed things up?

Yes, but….

Since warmer air has a higher moisture holding capacity, increasing the temperature will lower the overall humidity inside the dehydrator creating more capacity in the air to accept the moisture from the food. However, higher temperatures also kill enzymes that are beneficial, but that typically relates to “raw” food diets which suggest a temperature of 118 degrees or lower, which is not a common temperature for backpacking purposes.

The more important reason not to crank it up is case hardening, which occurs when the temperature is too high and dries the outside of the food too quickly. This creates a shell or “case” that slows down or completely stops the inside from drying. If this occurs the food may appear dry, and then spoil when you store it because it’s actually still moist.

The best way to speed up drying is to put less food into your dehydrator, get a bigger dehydrator, or increase the surface area of your food by cutting it smaller and spreading it thinner. Of course which method you choose depends on why you want to speed things along.

Why is there such a wide span in drying times?

Different foods have different amounts of water in it, and even the same food could have varying moisture from batch to batch. However, the main elements that dictate the drying time is very dynamic and range from what you’re dehydrating, how much you’re dehydrating, to how humid the environment is. A tray of celery will take significantly longer to dry than a tray of apples because celery is 95% water while apples are 84%, there’s just more water to remove.

Moreover, you can fit more celery on a tray than apples. Which brings us to the second point: total load. The amount of airflow and temperature stays the same, but it now has to remove more water. Imagine you have a bucket with 2 gallons of water in it and there’s a small hole at the bottom draining the water. If you add 2 more gallons it will take longer to drain, unless you make the hole bigger so it can drain faster. Unfortunately for us, the hole in this analogy is the rate at which our dehydrator can remove moisture, which we can’t really change. The more food you have in the dehydrator, the more moisture needs to be removed and the longer it will take.

Lastly, humidity is also a consideration. Those who live in humid climates or experience exceptionally humid days will need more time to dry the same item than someone who lives in the high desert where humidity is low. However, all this is negated if you dehydrate in a room with functioning air conditioning as that conditions air to a consistently comfortable low humidity level.